Phone:
(701)814-6992

Physical address:
​6296 Donnelly Plaza
Ratkeville, ​Bahamas.

An image showcasing a York cabinet transformation: an expertly painted cabinet in a vibrant hue, with a glossy finish that reflects its surroundings, exuding elegance and breathing new life into the space

Revitalize Your York Cabinets With Skilled Painting

Looking to revitalize your York cabinets? Skilled painting is the answer! With the right colors and techniques, you can transform your cabinets into stunning focal points.

In this article, we’ll guide you through the step-by-step process of preparing and painting your cabinets. From surface preparation to achieving a smooth finish, we’ll cover it all.

Get ready to achieve professional results and give your York cabinets a fresh new look.

Key Takeaways

  • Skilled cabinet painting protects cabinets and ensures a flawless and long-lasting finish.
  • Hiring professionals guarantees exceptional results and revitalizes the kitchen.
  • Skilled cabinet painting is a cost-effective way to achieve a professional finish and customize the look of your kitchen.
  • Updating the appearance of your cabinets increases the value of your home and extends the lifespan of your cabinets.

The Benefits of Skilled Cabinet Painting in York

An image showcasing a beautifully painted York cabinet, with flawless brushstrokes, vibrant colors, and a glossy finish

You’ll experience a fresh and vibrant kitchen with skilled cabinet painting in York.

One of the benefits of skilled cabinet painting is the ability to choose the right paint sheen. This is important because the sheen of the paint determines the overall look and durability of your cabinets. Whether you prefer a glossy, satin, or matte finish, a skilled painter can help you select the perfect sheen to complement your kitchen style.

Another advantage of hiring a professional is the expertise in protecting cabinets during the painting process. Skilled painters understand the importance of proper prep work, including covering surfaces, removing hardware, and using protective materials. This ensures that your cabinets are shielded from any potential damage or drips, resulting in a flawless and long-lasting finish.

Trusting the professionals for your cabinet painting needs in York guarantees exceptional results and peace of mind.

Choosing the Right Paint Colors for Your York Cabinets

An image showcasing York cabinets transformed with a fresh coat of paint

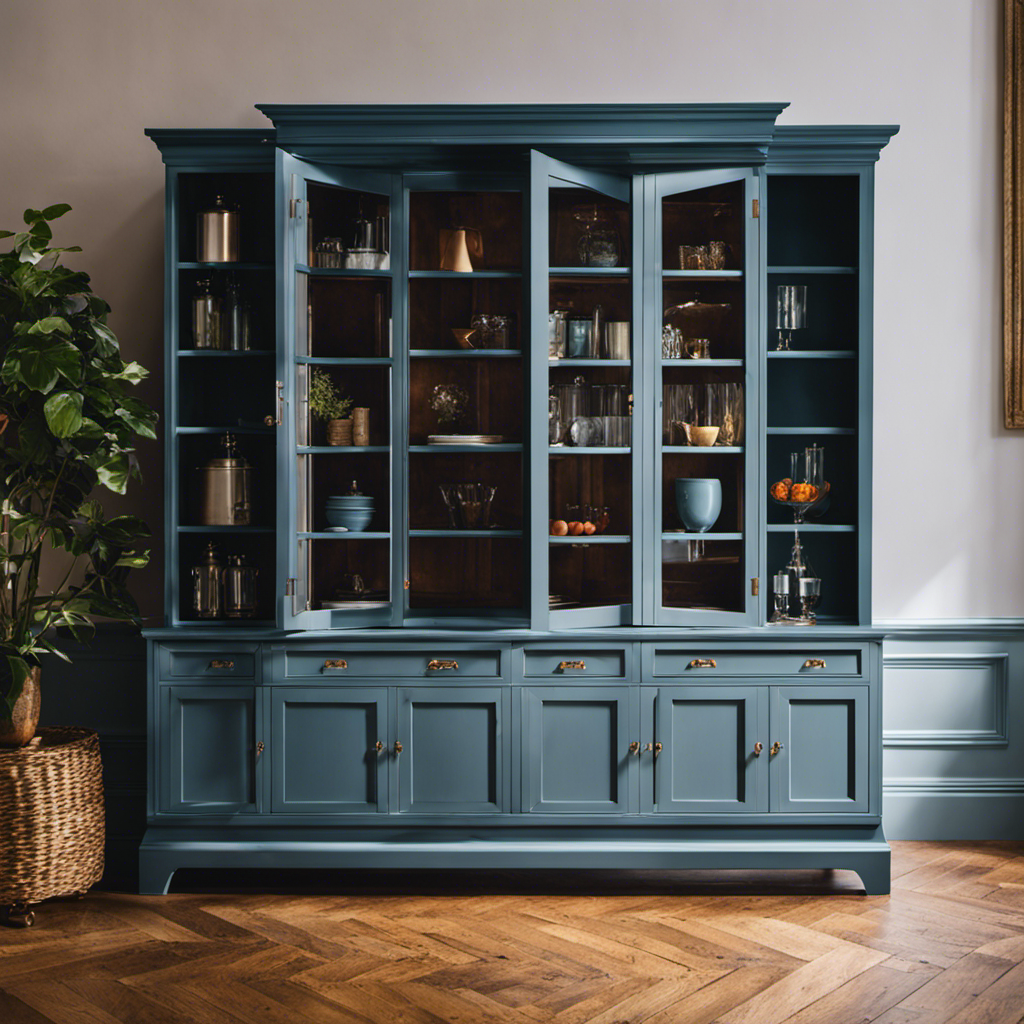
To achieve the perfect look for your York cabinets, consider selecting a few different paint colors to add depth and dimension to your kitchen space.

When choosing the right paint colors for your York cabinets, it’s important to consider current paint color trends and your personal style. Neutral tones like white, cream, and gray are popular choices that can create a clean and timeless look.

If you prefer a bolder statement, you can opt for vibrant colors like navy blue or emerald green. Another DIY cabinet painting tip is to consider the overall color scheme of your kitchen. You can choose complementary or contrasting colors to create a cohesive and visually appealing look.

Remember to always test your chosen paint colors on a small area before committing to a full cabinet makeover.

Step-by-Step Guide to Preparing Cabinets for Painting

An image showcasing the step-by-step process of preparing York cabinets for painting: meticulous sanding, detailed cleaning, delicate removal of hardware, and precise taping

Before starting the painting process, gather all the necessary materials and thoroughly clean the cabinets with a mild detergent and warm water. Once your cabinets are clean and dry, follow these steps to prepare them for painting:

  • Choosing the right primer: Select a high-quality primer that’s specifically designed for use on cabinets. This will ensure proper adhesion and provide a smooth, even surface for the paint.
  • Masking and protecting surfaces: Use painter’s tape to mask off any areas that you don’t want to paint, such as hinges or handles. Cover the surrounding surfaces with drop cloths or plastic sheeting to protect against drips and spills.
  • Sanding the cabinets: Lightly sand the cabinet surfaces with fine-grit sandpaper to create a rough texture that will help the paint adhere better.
  • Filling any imperfections: Use wood filler to fill in any cracks, holes, or dents in the cabinets. Once the filler is dry, sand it smooth.
  • Cleaning and deglossing: After sanding, wipe down the cabinets with a tack cloth to remove any dust. Then, degloss the surfaces using a liquid deglosser or a solution of equal parts water and denatured alcohol.

The Importance of Proper Surface Preparation for Cabinet Painting

An image showcasing a team of professional painters meticulously sanding and priming York cabinets, ensuring a flawless canvas for the upcoming paint job

Before you begin painting your cabinets, it’s crucial to understand the importance of proper surface preparation. Smooth and clean surfaces are essential for achieving a flawless paint finish.

Smooth and Clean Surfaces

For a successful cabinet painting project, you need to start with smooth and clean surfaces that have been properly prepared. This is crucial in achieving a flawless finish and ensuring the longevity of your cabinets.

Here are some key points to consider when preparing your surfaces:

  • Sanding: Start by sanding the cabinets to create a smooth surface. This will help the paint adhere better and prevent any imperfections from showing through.
  • Cleaning: Thoroughly clean the surfaces to remove any dirt, grease, or grime. This will ensure that the paint adheres properly and creates a clean finish.
  • Priming: Apply a primer before painting to create a smooth and even base. This will also help the paint adhere better and prevent any discoloration or bleeding.
  • Filling: Fill in any holes, cracks, or imperfections with wood filler or putty. This will create a seamless surface and ensure a professional-looking finish.
  • Taping: Use painter’s tape to protect any areas that you don’t want to paint. This will help create clean lines and prevent any accidental paint drips.

Enhances Paint Adhesion

Proper surface preparation is crucial for achieving a long-lasting and professional-looking finish when painting cabinets. By following the right steps, you can significantly improve the paint durability and achieve a high-quality, professional finish.

One important aspect of surface preparation is cleaning the cabinets thoroughly. This removes any grease, dirt, or residue that could hinder the paint’s adhesion.

Next, sanding the cabinets helps to create a rough surface that allows the paint to grip onto.

Additionally, using a primer before applying the paint can further enhance adhesion and improve the overall finish.

Taking the time to properly prepare your cabinets before painting won’t only result in a beautiful and long-lasting paint finish but also ensure that your cabinets maintain their appearance for years to come.

Transition: Now that we’ve discussed the importance of proper surface preparation for cabinet painting, let’s explore the next section about achieving a long-lasting paint finish.

Long-lasting Paint Finish

To ensure a lasting paint finish on your cabinets, follow these key steps for proper surface preparation:

  • Clean the cabinets thoroughly to remove any dirt, grease, or grime that could interfere with paint adhesion.
  • Sand the cabinets to create a rough surface, allowing the paint to adhere better.
  • Fill any cracks, dents, or imperfections with wood filler, ensuring a smooth and even surface for painting.
  • Prime the cabinets with a high-quality primer to create a strong bond between the surface and the paint.
  • Finally, apply the paint using expert techniques such as brushing or spraying, ensuring even coverage and a smooth finish.

Proper surface preparation is essential for achieving a long-lasting paint finish on your cabinets. By following these steps, you can enjoy the longevity benefits of a well-painted cabinet that will enhance the overall appearance of your kitchen or bathroom.

Techniques and Tools for Achieving a Smooth Cabinet Finish

An image showcasing a skilled painter using a high-quality paint sprayer to achieve a flawless and smooth finish on York cabinets

To achieve a smooth cabinet finish, you have two main application options: spraying or brushing.

Spraying can provide a flawless, professional look, but it requires more skill and equipment.

Brushing, on the other hand, is easier for beginners but may result in visible brush strokes.

Additionally, proper preparation and sanding techniques are crucial for a smooth finish, so be sure to clean and sand the cabinets thoroughly before painting.

Spray Vs. Brush Application

When painting your York cabinets, consider the benefits of using either a spray or brush application for achieving a smooth finish. Here is a cost comparison, along with the pros and cons of each method:

Spray Application:
Pros:

  • Provides a flawless, professional look.
  • Faster application, especially for large areas.
  • Allows for even coverage on intricate details.

Cons:

  • Requires more equipment and setup.
  • Can be more expensive due to the cost of the spray gun.
  • Overspray can be an issue if not properly controlled.

Brush Application:
Pros:

  • More affordable as it requires minimal equipment.
  • Easier to control for precise application.
  • Can be done by DIY homeowners.

Cons:

  • May leave brush marks if not applied properly.
  • Slower process, especially for larger areas.
  • Can be challenging to achieve a flawless finish.

Consider these factors when deciding which method is best for your York cabinets.

Preparation and Sanding Techniques

Before you begin painting your York cabinets, make sure to properly prepare and sand the surfaces to achieve a smooth and flawless finish.

Preparing the surfaces is crucial for a successful painting project. Start by removing all hardware, such as handles and hinges, and clean the cabinets thoroughly to remove any dirt or grease.

Next, fill any cracks or holes with wood putty and sand them down until they’re flush with the surface. When it comes to sanding techniques, use a fine-grit sandpaper to gently sand the cabinets in the direction of the wood grain. This will help to create a smooth and even surface for the paint to adhere to.

Once the cabinets are properly prepared and sanded, you can move on to selecting the best paint for your York cabinets.

How to Select the Best Paint for Your York Cabinets

An image featuring a close-up view of a York cabinet with various paint cans surrounding it, displaying a palette of rich colors, showcasing the transformation and highlighting the process of selecting the perfect paint

You should start by considering the best paint options for your York cabinets. Here are some factors to keep in mind when making your selection:

  • Durability: Look for a paint that’s specifically designed for cabinets and can withstand daily wear and tear.
  • Finish: Decide on the desired finish for your cabinets, whether it’s a glossy, satin, or matte look.
  • Color: Choose a color that complements your kitchen or bathroom decor and enhances the overall aesthetic.
  • Application: Consider the ease of application and whether you prefer a brush, roller, or spray-on paint.
  • Drying time: Take into account the drying time of the paint to ensure it fits your schedule.

By carefully considering these factors, you can make an informed decision and ensure a successful cabinet painting project.

Now, let’s move on to the next section and explore some tips for achieving a professional cabinet painting result.

Tips for Achieving a Professional Cabinet Painting Result

An image showcasing a skilled painter meticulously prepping York cabinets: sanding and filling imperfections, taping off edges, and applying smooth, even coats of paint with precision brushes and rollers

To achieve a professional cabinet painting result, there are a few key tips you should keep in mind.

First, make sure to carefully select the right color for your cabinets, taking into consideration the overall aesthetic of your kitchen.

Additionally, proper surface preparation is crucial to ensure a smooth and long-lasting finish.

Color Selection Tips

When choosing colors for your cabinets, consider the overall aesthetic and functionality you want to achieve with your professional cabinet painting result. To help you achieve the desired outcome, here are some color selection tips:

  • Follow paint color trends: Stay updated with the latest paint color trends to ensure your cabinets look modern and stylish.
  • Understand color psychology: Different colors evoke different emotions and moods. Consider the atmosphere you want to create in your space and choose colors accordingly.
  • Consider the size of the room: Lighter colors can make a small space appear larger, while darker colors can add depth and drama to a larger room.
  • Coordinate with your existing decor: Take into account the color palette of your existing furnishings and accessories to create a cohesive look.
  • Test samples before committing: Before finalizing your cabinet color, test samples on a small area to see how they look in different lighting conditions.

Proper Surface Preparation

  1. Start by cleaning the cabinet surfaces thoroughly to remove dirt, grease, and grime. Use a mild detergent and warm water to scrub the cabinets, paying special attention to areas with built-up residue. Rinse the cabinets with clean water and allow them to dry completely before proceeding.
  2. After cleaning, it’s essential to properly prepare the cabinet surfaces for painting. This includes sanding the cabinets to create a smooth and even surface for the paint to adhere to. Use a fine-grit sandpaper and gently sand the cabinets in the direction of the wood grain. Wipe away any dust or debris with a clean cloth.
  3. Next, apply a high-quality primer to the cabinet surfaces. Priming helps to seal the wood and create a solid foundation for the paint. Choose a primer that’s specifically designed for use on cabinets and follow the manufacturer’s instructions for application.
  4. By taking the time to properly clean and prepare the cabinet surfaces, and using appropriate priming techniques, you can achieve a professional-looking result when painting your York cabinets. This will ensure that the paint adheres well and lasts for years to come.

Understanding the Different Cabinet Painting Methods

An image showcasing a professional painter using the traditional brush-on method to revitalize York cabinets, while another painter demonstrates the efficient spray-painting technique

Choose the best cabinet painting method to achieve the desired results for your York cabinets. Understanding the different cabinet painting methods is crucial in achieving a professional finish. Here are five popular techniques to consider:

  • Brushing: This traditional method involves using a paintbrush to apply paint evenly on the surface of the cabinets. It allows for precise control and can create a smooth finish.
  • Spraying: Spraying cabinets with a paint sprayer provides a flawless, factory-like finish. It’s ideal for cabinets with intricate details or hard-to-reach areas.
  • Rolling: Using a roller is a quick and efficient way to paint cabinets. It’s best suited for flat or slightly textured surfaces.
  • Sanding: Sanding cabinets before painting helps to create a smooth surface and ensures better paint adhesion.
  • Staining: Staining is a technique that enhances the natural beauty of wood cabinets by adding color while still allowing the wood grain to show through.

Each method has its own benefits and considerations, so choose the one that suits your needs and preferences.

Frequently Encountered Challenges in Cabinet Painting and How to Overcome Them

An image featuring a York cabinet with peeling paint, uneven brush strokes, and visible brush marks

Don’t let common challenges deter you from achieving a professional cabinet painting finish. Overcoming these challenges will ensure that you achieve the desired result.

One challenge that you may encounter is uneven paint application. This can be caused by improper preparation or using the wrong type of paint. To overcome this, make sure to thoroughly clean and sand the cabinets before applying primer and paint.

Another challenge is paint drips and brush marks. To avoid this, use a high-quality brush and apply thin coats of paint, allowing each coat to dry before applying the next. Additionally, be mindful of the temperature and humidity levels in the room, as these can affect the drying time and finish of the paint.

Maintaining and Caring for Your Newly Painted York Cabinets

An image showcasing a pair of freshly painted York cabinets, gleaming with a flawless finish

To properly maintain and care for your newly painted York cabinets, regularly wipe them down with a soft cloth and gentle cleaning solution, ensuring that you avoid harsh chemicals and abrasive materials.

Here are some tips for cabinet maintenance and protecting painted surfaces:

  • Avoid using scrub brushes or abrasive sponges, as they can scratch the paint.
  • Clean up spills or stains immediately to prevent them from setting into the paint.
  • Use coasters or placemats to protect the cabinet surfaces from heat, moisture, and scratches.
  • Avoid placing heavy objects on the cabinets to prevent them from denting or causing structural damage.
  • Consider applying a protective topcoat to enhance the durability and longevity of the paint.

Frequently Asked Questions

How Much Does Skilled Cabinet Painting in York Typically Cost?

Skilled cabinet painting in York typically costs more than doing it yourself. A cost comparison between DIY and professional services is important to determine if the investment is worth it for you.

Can I Paint Over My Existing Cabinet Finish, or Do I Need to Strip It First?

You can paint over your existing cabinet finish, but stripping it first has benefits. Stripping allows for a smoother application and longer-lasting results. Consider the condition of your cabinets and the desired outcome before making a decision.

How Long Does It Usually Take to Prepare Cabinets for Painting?

On average, it takes some time to prepare cabinets for painting. There are necessary steps that need to be taken, such as cleaning, sanding, and priming, before you can start painting.

What Type of Paint Is Best for Cabinets in High-Humidity Areas, Such as Kitchens and Bathrooms?

For high-humidity areas like kitchens and bathrooms, it’s best to use paint brands specifically designed for cabinets. Some tips for painting cabinets in these areas include ensuring proper ventilation and using a primer.

Is It Possible to Change the Color of My Cabinets Without Completely Repainting Them?

Yes, it is possible to change the color of your cabinets without completely repainting them. There are alternative techniques, such as cabinet refinishing or staining, that can achieve the desired color transformation.

Leave a Reply

Your email address will not be published. Required fields are marked *