Phone:
(701)814-6992
Physical address:
6296 Donnelly Plaza
Ratkeville, Bahamas.
Phone:
(701)814-6992
Physical address:
6296 Donnelly Plaza
Ratkeville, Bahamas.
40 Years still going strong
40 Years still going strong
Are you looking to achieve a flawless painting finish in York? Look no further! In this article, we will guide you through 14 essential steps to help you achieve that perfect result.
From assessing the surface condition to cleaning and maintaining the painted surface, we’ve got you covered.
Get ready to transform your space with a professional-looking paint job. Let’s dive in and make your painting dreams a reality!
Before you start painting, you need to assess the condition of the surface. Surface preparation is crucial for achieving a perfect painting finish in York.
Begin by evaluating the surface quality to determine if any repairs or treatments are necessary. Look for cracks, holes, or unevenness that may affect the final result. Inspect for any peeling or flaking paint, as this will need to be removed before proceeding. Additionally, check for any moisture or mold issues that could cause problems later on.
By thoroughly assessing the surface, you can identify and address any issues that may affect the longevity and appearance of your paint job.
Once you have evaluated the surface, you can move on to the next step of cleaning and removing dirt and grime.
To ensure a flawless painting finish, start by cleaning the surface thoroughly to remove any dirt or grime that may affect the final result. Using the right cleaning techniques is crucial to achieve a pristine surface.
Begin by dusting the area with a soft cloth or broom to remove loose particles.
Next, use a mild detergent or cleaning solution mixed with warm water to scrub away any stubborn dirt. For particularly tough stains or grime, consider using a degreaser or a specialized cleaner for the specific surface material.
Remember to rinse the area thoroughly with clean water to remove any residue.
Taking the time to remove stubborn dirt and grime will ensure that your painting project starts off on the right foot and results in a smooth and flawless finish.
Fill in any cracks and holes in the surface before starting your painting project. Repairing cracks and hole patching are crucial steps to ensure a smooth and flawless finish.
Begin by inspecting the surface for any visible cracks or holes. Use a putty knife to remove any loose debris or paint chips surrounding the damaged area.
Next, apply a suitable patching compound or spackle to fill in the cracks and holes. Smooth the compound using the putty knife, ensuring it’s level with the surrounding surface.
Allow the patch to dry completely before lightly sanding it to achieve a seamless blend with the rest of the wall. By repairing cracks and holes beforehand, you’ll create a solid foundation for your paint job, resulting in a professional-looking finish.
Smooth out any imperfections in the surface by sanding them with a fine-grit sandpaper. This step is crucial in achieving a perfect painting finish in York.
Start by inspecting the surface for any bumps, ridges, or rough patches. Using a sanding block, apply even pressure as you move the sandpaper in circular or back-and-forth motions.
For a more efficient process, consider wet sanding by dampening the sandpaper with water. This helps to reduce dust and allows for smoother sanding.
Be sure to sand the entire surface evenly, paying extra attention to areas with imperfections.
Once you have achieved a smooth and even surface, wipe away any dust or debris before applying primer or paint.
Now that you’ve smoothed and sanded any imperfections on the surface, it’s time to move on to priming.
Primer is an essential step in achieving a perfect painting finish as it helps the paint adhere better and provides a uniform base.
Choosing the right primer for your specific surface is crucial, whether it’s wood, metal, or drywall.
Understanding proper application techniques will ensure a smooth and long-lasting result.
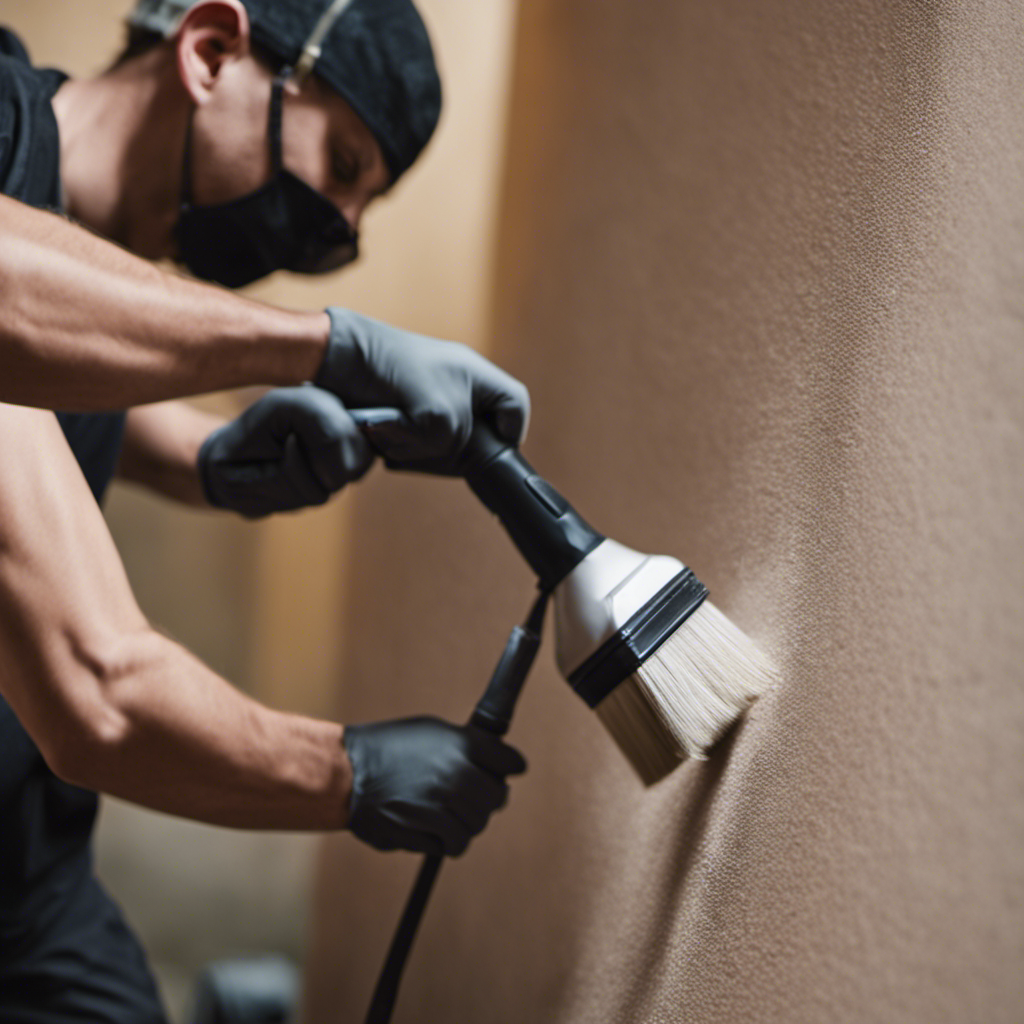
To achieve a perfect painting finish in York, start by applying a primer to the surface, ensuring optimal adhesion and durability. The importance of primer can’t be overstated. It acts as a foundation for the paint, creating a smooth and even surface for better paint application.
Before applying primer, it’s crucial to properly sand the surface to remove any imperfections and create a smooth base. This step ensures that the primer adheres properly and prevents any paint peeling or flaking in the future.
Additionally, using proper paint application techniques, such as using even strokes and maintaining a consistent thickness, is vital for a flawless finish.
Have you considered which primer is the right choice for priming the surface before painting? Choosing the right primer is an essential step in achieving a perfect painting finish.
The primer is responsible for surface preparation, ensuring that the paint adheres properly and lasts longer. When selecting a primer, it’s crucial to consider the type of surface you’re working with. For example, if you’re painting over a glossy or slick surface, it’s best to choose a primer specifically designed for that purpose.
Additionally, consider the type of paint you’ll be using and choose a primer that’s compatible with it. By selecting the right primer, you can enhance paint adhesion and ensure a smooth and long-lasting finish.
Before you begin painting, make sure to properly apply primer to the surface. This step is crucial in achieving a smooth finish for your painting project. Follow these proper application techniques to ensure the best results:
When selecting paint and tools, make sure you consider the specific needs of your painting project. Choosing the right paint is essential for achieving a perfect finish. Consider factors such as the surface you’re painting, the desired finish, and any special requirements, like resistance to moisture or chemicals. Different paints have different properties, so make sure to read the labels and choose one that suits your needs.
Additionally, proper brush selection is crucial for achieving a smooth and even application. Consider the type of paint you’re using and the surface you’re painting on when selecting your brushes. Synthetic brushes work well with latex or water-based paints, while natural bristle brushes are better suited for oil-based paints.
Now that you have chosen your paint and brushes, it’s time to move on to preparing and mixing the paint.
To achieve a perfect painting finish, you need to carefully prepare and mix the paint. Here are four essential steps to follow for successful paint preparation and mixing techniques:
Start by applying a smooth and even first coat of paint to achieve the desired finish. This step is crucial in creating a flawless painting result.
To ensure proper coverage, assess the paint’s opacity by observing how well it hides the surface beneath. If necessary, apply additional coats until you achieve the desired coverage.
Additionally, it’s important to focus on achieving evenness throughout the application process. Use long, even strokes or a high-quality roller to create a consistent texture. Pay attention to any areas that may require touch-ups or additional paint.
Once you have finished applying the first coat, allow proper drying time before moving on to the next step. This will ensure that the paint adheres properly and reduces the risk of smudging or unevenness.
After you have finished applying the first coat, it’s important to allow ample drying time so that the paint can properly adhere to the surface. Proper drying time is crucial for achieving a perfect painting finish in York.
Here are four essential steps to ensure that you prevent streaking and achieve even coverage:
To achieve a perfect painting finish in York, it’s crucial to understand the importance of sanding between coats.
By using proper sanding techniques, you can ensure a smooth surface that will enhance the overall appearance of your paint job.
Not only does sanding improve the adherence of subsequent layers, but it also saves you time by minimizing imperfections that may require additional touch-ups.
Use a fine-grit sandpaper to smooth the surface between each coat of paint. This step is crucial in achieving a smooth and professional finish for your painting project.
Here are some sanding technique tips to help you achieve the best results:
Achieving a perfect painting finish in York requires ensuring the smoothness of each coat through proper sanding techniques.
The importance of preparation can’t be overstated when it comes to achieving a flawless finish. Sanding between coats is a crucial step in the painting process as it helps to create a smooth surface by removing any imperfections or roughness.
By sanding between coats, you’re able to create a uniform and professional-looking finish. This step also helps the subsequent coats to adhere better, resulting in a more durable and long-lasting paint job.
Sanding between coats may seem time-consuming, but the end result is well worth the effort. With proper sanding techniques, you can achieve a smooth and flawless finish that will make your painting project stand out.
Now, let’s move on to some time-saving sanding hacks that will help you achieve a perfect painting finish in less time.
Save time when sanding between coats by using a sanding block. This simple tool will help you achieve a flawless finish in less time.
Here are four time-saving painting techniques you can use when sanding between coats:
To achieve a perfect painting finish in York, you should apply additional coats for better coverage and a more professional look. When applying thin coats of paint, you ensure that each layer dries evenly and minimizes the risk of drips or uneven coverage.
It’s important to manage the drying time between each coat. Follow the instructions on the paint can for the recommended drying time, and make sure to allow enough time for the previous coat to fully dry before applying the next one. This will prevent any smudging or damage to the previous layer.
By applying additional coats, you can achieve a smooth and flawless finish.
Now, let’s move on to the next step: detailing and touching up.
For a flawless painting finish in York, pay attention to detailing and touch up any imperfections. Here are four essential steps to help you achieve a perfect result:
To ensure a long-lasting and durable paint finish, seal and protect it with a clear coat or varnish. Sealing techniques play a vital role in protecting against moisture, which can lead to peeling, cracking, and other damage to the paint. Here are some effective techniques for sealing and protecting your paint finish:
| Sealing Technique | Description |
|---|---|
| Clear coat | A transparent protective layer that adds shine and durability to the paint. |
| Varnish | A clear, protective finish that enhances the color and provides resistance against moisture. |
| Primer | Applied before painting, it creates a barrier between the surface and the paint, ensuring better adhesion and protection. |
| Weatherproofing | Specialized products that offer additional protection against harsh weather conditions. |
To ensure the longevity of your painted surface, it’s crucial to prevent paint peeling by regularly inspecting for any signs of damage or wear.
Additionally, applying a long-term surface protection like a clear coat or sealant can help maintain the integrity of the paint and provide added resistance to dirt, stains, and UV rays.
Lastly, when it comes to cleaning stubborn stains on your painted surface, opt for gentle cleaning solutions and techniques to avoid damaging the paint while effectively removing the stains.
You can prevent paint peeling by regularly cleaning and maintaining the painted surface. Here are four important steps to help you avoid paint peeling and maintain a flawless finish:
Regularly clean and maintain the painted surface to ensure long-term protection. By taking proper care of your painted surfaces, you can extend the paint longevity and preserve the overall appearance of your home or business. Here are some essential steps for cleaning and maintaining the painted surface:
| Cleaning Methods | Maintenance Tips |
|---|---|
| Use a mild detergent | Inspect for any signs of damage |
| Gently scrub with a soft cloth | Touch up any chipped or peeling paint |
| Avoid abrasive cleaners | Regularly dust the surface |
| Rinse with clean water | Apply a protective topcoat |
Cleaning and maintaining the painted surface not only enhances the aesthetic appeal but also protects it from dirt, grime, and environmental factors. By following these steps, you can ensure the long-term preservation of your painted surfaces and enjoy their beauty for years to come.
If you encounter stubborn stains on your painted surface, try using a mild detergent and gently scrubbing with a soft cloth to remove them. Deep cleaning is sometimes necessary to get rid of tough stains and maintain the beauty of your paint finish. Here are some effective stain removal techniques to consider:
Remember to always be gentle when cleaning your painted surface to avoid damaging the paint.
Typically, it takes a few hours for paint to dry before you can apply additional coats. To ensure the best finish, make sure each coat is fully dry and follow recommended drying times.
For a perfect painting finish in York, it’s recommended to use high-quality tools like angled brushes and paint sprayers. These tools help achieve a smooth and even finish. Remember to follow the essential steps for a flawless result.
To achieve a smooth finish when applying paint, avoid common mistakes like using cheap brushes, not properly preparing the surface, rushing the process, and applying too much paint at once. Follow these tips for a flawless result.
To properly maintain a painted surface and ensure its longevity, you need to follow proper cleaning techniques. Regularly clean the surface with a mild soap and water solution, avoiding harsh chemicals that could damage the paint.
To achieve a perfect painting finish, it’s necessary to seal and protect the painted surface. There are recommended products available for this purpose, ensuring the longevity and beauty of your paint job.